
Same-Day Sourdough Sandwich Bread Recipe
Introduction
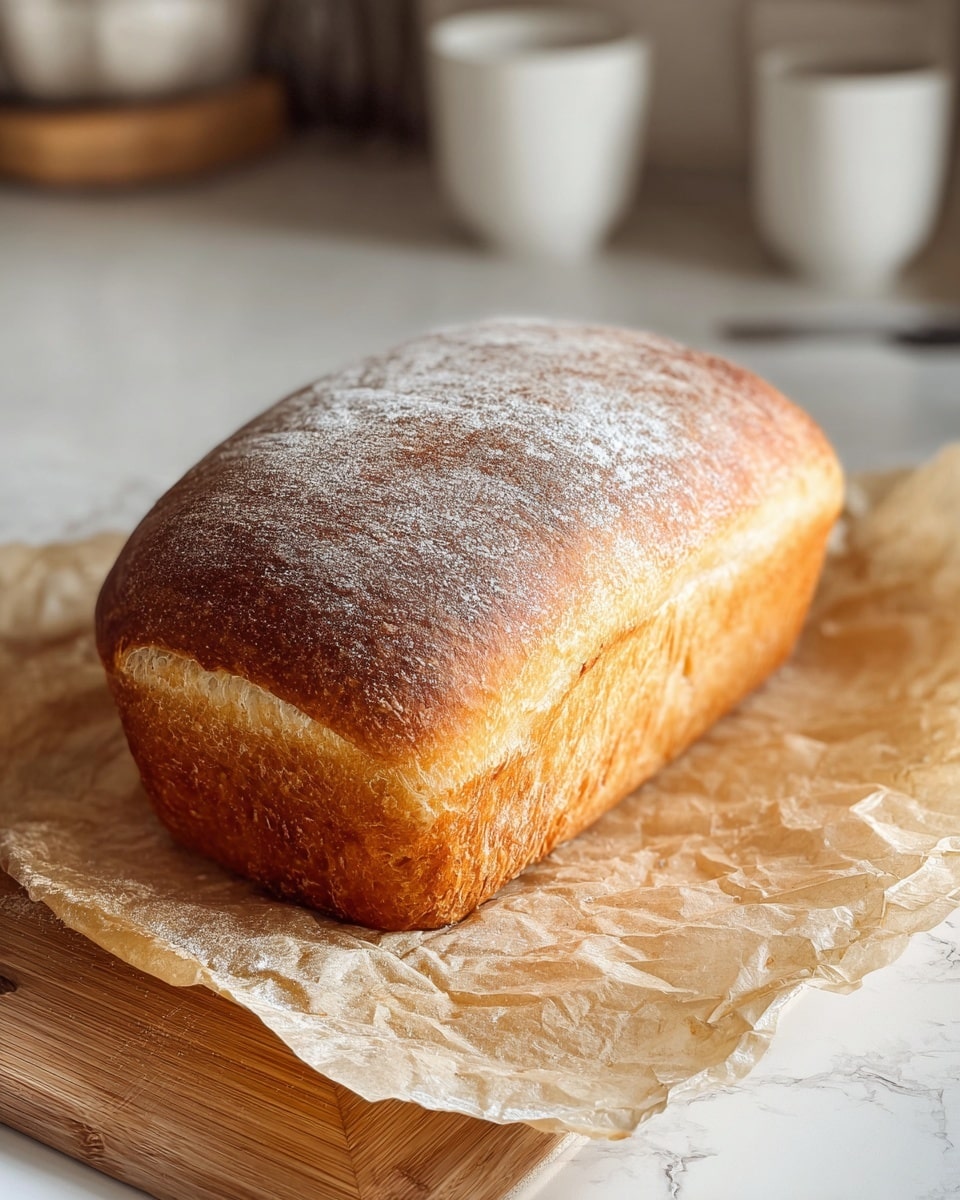
This same-day sourdough sandwich bread offers a delicious homemade loaf with a tender crumb and crisp crust. It’s perfect for sandwiches or toasting, made using an active sourdough starter and simple ingredients. The recipe includes detailed steps for shaping and proofing to ensure a beautiful rise and flavorful bread.
Ingredients
- 325 grams warm water (room temperature)
- 100 grams leavened sourdough starter
- 40 grams honey
- 20 grams olive oil
- 500 grams unbleached King Arthur bread flour (or all-purpose flour)
- 10 grams salt
Instructions
- Step 1: Place a mixing bowl on a food scale. Add the warm water, olive oil, honey, and active sourdough starter. Remove the bowl from the scale and stir with a bread whisk until the honey and starter are dissolved.
- Step 2: Return the bowl to the scale, zero it, then add the flour and salt. Remove the bowl and mix the dough by hand until it forms a shaggy mass, scraping down the sides of the bowl. Cover with plastic wrap and let it sit in a warm place for one hour to autolyse.
- Step 3: With wet hands, stretch and fold the dough. Gently pull one side up and fold it toward the center, repeating on all sides. Cover the bowl and let rest for 45 minutes. Repeat this stretch and fold process a total of 3 times.
- Step 4: Cover the bowl and allow the dough to bulk rise for 3 to 4 hours in a warm spot (around 90°F if possible) until it nearly doubles in size and becomes bubbly.
- Step 5: Turn the dough out onto a clean countertop, dusted with a little flour if sticky. Cover with a tea towel and rest for 10 minutes to relax the dough.
- Step 6: Stretch the dough by hand into a rectangle on the countertop. Fold one side to the center, then fold the opposite side over it to form a long rectangle.
- Step 7: Roll the rectangle tightly into a small log. Shape by pressing both hands on one side and pushing towards you to create tension, then rotate and repeat. Pinch the ends closed.
- Step 8: Optionally, roll the top of the dough in oats, seeds, or your desired toppings.
- Step 9: Grease a bread pan or line it with parchment paper. Place the dough seam-side down in the pan. Smooth the top with your fingers to ensure an even rise.
- Step 10: Wrap the pan in a food-safe plastic bag and proof in a warm place for 1 hour or until the dough reaches the top of the pan. Alternatively, refrigerate for a slow overnight fermentation, keeping it covered to avoid a hard crust.
- Step 11: Preheat oven to 375°F (190°C). Bake the bread uncovered for 35–40 minutes, until the crust is golden and the internal temperature reaches 205°F (96°C). If baking after refrigeration, bake the loaf cold.
Tips & Variations
- Use a warm proofing spot like an oven set to its lowest temperature or a proof setting to speed up rising.
- Add your favorite seeds or oats for texture and flavor on top of the loaf before baking.
- For a softer crust, brush the top with olive oil before baking instead of using toppings.
- If your dough is sticky, use a bench scraper to help shape instead of adding extra flour.
Storage
Store the bread in a paper bag or wrapped loosely in a kitchen towel for up to 3 days at room temperature to maintain crust crispness. For longer storage, slice and freeze the bread, then toast slices directly from the freezer. Reheat in a 350°F oven for 10 minutes to refresh the crust if stored at room temperature.
How to Serve
Serve this delicious recipe with your favorite sides.
FAQs
Can I use all-purpose flour instead of bread flour?
Yes, all-purpose flour can be used. The bread may be slightly less chewy but will still turn out delicious.
What if I don’t have a sourdough starter?
This recipe relies on an active sourdough starter for leavening. You can make one at home or substitute with commercial yeast, but expect different flavor and rise times.
Print
Same-Day Sourdough Sandwich Bread Recipe
- Total Time: 5 to 6 hours (including fermentations)
- Yield: One 9x5 inch loaf 1x
- Diet: Vegetarian
Description
This recipe for same-day sourdough sandwich bread offers a quick and effective way to enjoy fresh, homemade sourdough without the usual extended fermentation times. Using an active sourdough starter, a warm water mixture, and a series of stretch and folds, this bread develops a strong gluten structure to achieve a beautiful rise and texture. The dough undergoes two proofing stages—including a bulk fermentation and a final rise in a bread pan—resulting in a soft, flavorful loaf with a golden crust, perfect for sandwiches or toasting.
Ingredients
Wet Ingredients
- 325 grams warm water (room temperature)
- 100 grams leavened sourdough starter (active)
- 40 grams honey
- 20 grams olive oil
Dry Ingredients
- 500 grams unbleached King Arthur bread flour (or all-purpose flour)
- 10 grams salt
Instructions
- Mix Wet Ingredients: Place a mixing bowl on a food scale and add the warm filtered water, olive oil, honey, and active sourdough starter. Using a bread whisk, mix until the honey and starter are fully dissolved.
- Add Dry Ingredients and Form Dough: Zero the scale with the bowl on it, add 500 grams of unbleached flour and 10 grams of salt. Remove the bowl and mix the dough with your hand to form a shaggy dough, scraping the sides as needed. Cover the bowl with plastic wrap and let the dough autolyse in a warm place for 1 hour.
- Stretch and Fold: With wet hands, gently stretch the dough from underneath and fold it over the center, repeating on all sides. Cover and rest for 45 minutes. Repeat this stretch and fold cycle three times total to build gluten strength.
- Bulk Fermentation: Cover the bowl and let the dough rise in a warm area (around 90°F using the oven proof setting if available) for 3 to 4 hours until nearly doubled in size and bubbly. Timing depends on ambient temperature.
- Pre-shape and Rest: Gently tip the dough out onto a lightly floured countertop, cover with a tea towel, and let rest for 10 minutes to relax the gluten for easier shaping.
- Shape the Dough: Stretch the dough into a rectangle on the counter. Fold one side to the center, then the opposite side to form a long rectangle. Roll tightly into a log, creating surface tension by pushing with your hands and rotating. Pinch the ends closed.
- Add Toppings (optional): Roll the top of the dough log in oats, seeds, or other desired toppings before placing it in the bread pan.
- Prepare Pan and Final Proof: Oil or line a bread pan with parchment paper. Place the shaped dough seam side down in the pan with the topping side facing up. Smooth the top by tucking in sides with fingers. Wrap the pan in food-safe plastic bags and proof in a warm area for 1 hour or until the dough rises close to the top of the pan. Alternatively, do a slow fermentation overnight in the refrigerator covered tightly.
- Bake the Bread: Preheat the oven to 375°F. Bake the loaf uncovered for 35-40 minutes until the crust is golden brown and the internal temperature reaches 205°F. If baking after slow refrigeration, bake the dough cold from the fridge.
Notes
- Using warm water helps activate the sourdough starter and speeds fermentation.
- Stretch and fold technique builds gluten strength without kneading.
- The bulk fermentation time may vary greatly depending on room temperature; warmer environments speed up rising.
- Resting the dough after shaping relaxes the gluten, making rolling easier.
- Optional toppings add texture and flavor but are not required.
- Slow fermentation in the fridge intensifies flavor and can be used for better scheduling.
- Ensure internal bread temperature reaches 205°F to confirm it’s fully baked.
- Prep Time: 1 hour 15 minutes
- Cook Time: 35-40 minutes
- Category: Bread
- Method: Baking
- Cuisine: American
Keywords: sourdough bread, same-day sourdough, sandwich bread, homemade bread, bread baking, no knead bread


