
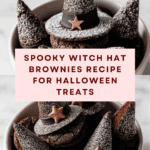
Witch Hat Brownies That Cast a Spell Recipe
Introduction
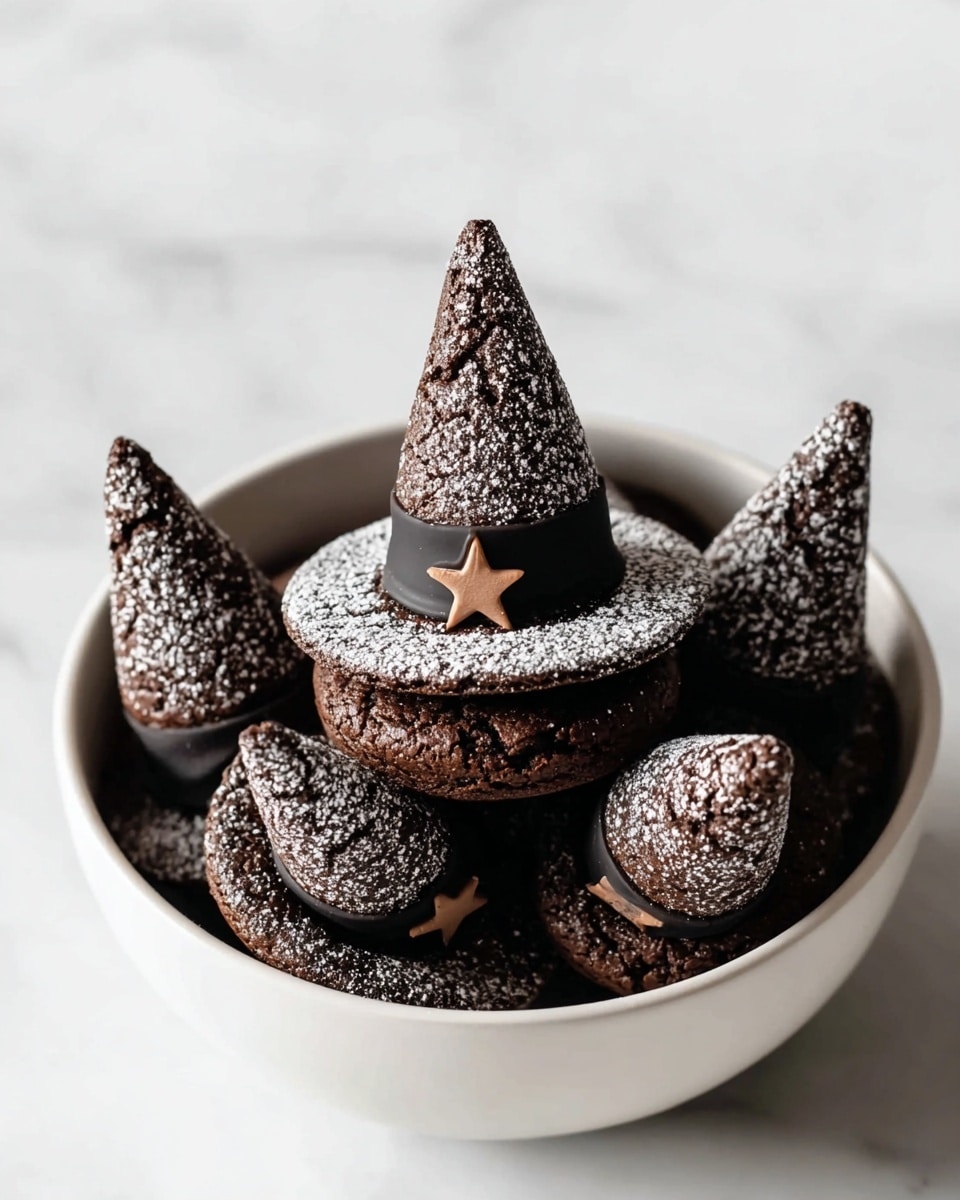
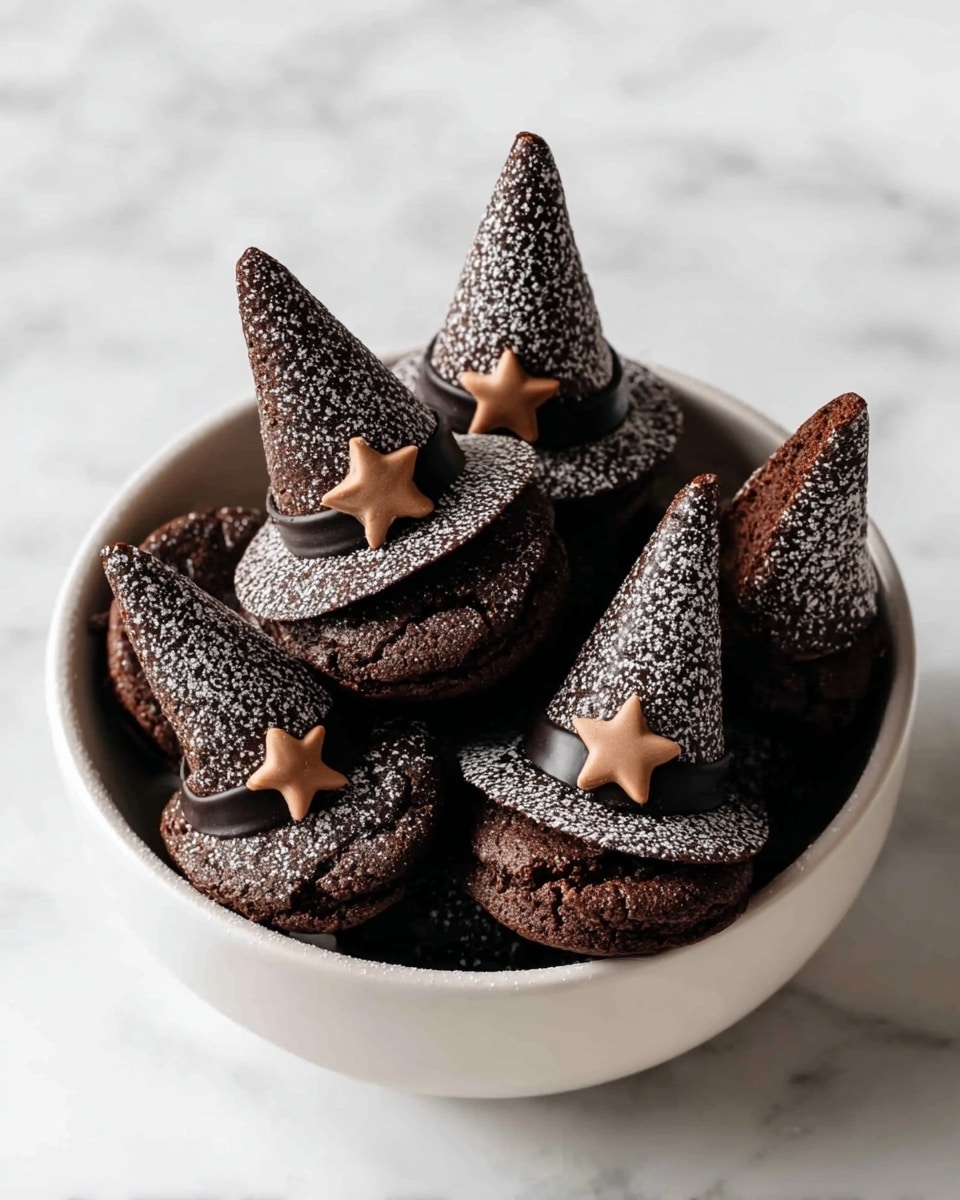
These Witch Hat Brownies are a fun and festive treat perfect for Halloween or any spooky celebration. Combining rich chocolate brownies with cute sugar cone hats, they’re sure to delight both kids and adults alike.
Ingredients
- 1 box brownie mix (plus ingredients called for on the box)
- 12 sugar cones
- 1 cup chocolate chips
- Orange decorating gel
- 12 round cookies (optional, for the brim)
Instructions
- Step 1: Prepare the brownies according to the package directions, baking them in a 9×13 inch pan. Allow the brownies to cool completely before proceeding.
- Step 2: Use a round cookie cutter or a glass to cut out 12 circles from the cooled brownies.
- Step 3: Melt the chocolate chips in the microwave in 30-second intervals, stirring well after each until smooth.
- Step 4: Dip the rim of each sugar cone into the melted chocolate, then place the cone upside-down onto each brownie circle.
- Step 5: Use the orange decorating gel to draw a small square “buckle” on each cone to create the look of a witch’s hat.
- Step 6: If using cookies for wider brims, attach one cookie under each brownie circle using a bit of the melted chocolate as glue.
Tips & Variations
- For extra flavor, add a teaspoon of vanilla or a pinch of cinnamon to the brownie batter before baking.
- Use dark or white chocolate chips for melting to vary the hat’s look.
- Swap orange decorating gel with colored sprinkles or edible glitter for a different decoration style.
- If you don’t have a round cookie cutter, use the rim of a drinking glass to cut brownie circles.
Storage
Store the witch hat brownies in an airtight container at room temperature for up to 3 days. Keep them out of direct sunlight to avoid melting the chocolate decorations. For longer storage, refrigerate them for up to a week and bring to room temperature before serving. Avoid freezing as it may affect the texture of the cones and brownies.
How to Serve
Serve this delicious recipe with your favorite sides.
FAQs
Can I make these brownies from scratch instead of using a mix?
Yes, you can use your favorite homemade brownie recipe instead of a box mix. Just make sure to bake them in a 9×13 pan and cool completely before cutting out circles.
What if I can’t find sugar cones?
Regular ice cream cones can be used as a substitute, but sugar cones are preferred because they hold their shape better and have a sweeter flavor. You can also look for waffle cones for a different texture.
Print
Witch Hat Brownies That Cast a Spell Recipe
- Total Time: 45 minutes
- Yield: 12 witch hat brownies 1x
Description
These Witch Hat Brownies are a fun and festive Halloween treat that combine rich, fudgy brownies with chocolate-dipped sugar cones, creating adorable edible witch hats perfect for parties or spooky celebrations.
Ingredients
Brownie Base
- 1 box brownie mix (plus required ingredients on box, typically eggs, oil, and water)
Decorations
- 12 sugar cones
- 1 cup chocolate chips
- Orange decorating gel
- 12 round cookies (optional, for wider brim)
Instructions
- Bake the Brownies: Prepare the brownie mix according to the package directions, baking it in a 9×13 inch pan. Once baked, allow the brownies to cool completely so they set properly.
- Cut Brownie Circles: Use a round cookie cutter or a large glass to cut 12 circles from the cooled brownies. These will serve as the base of the witch hats.
- Melt Chocolate Chips: Melt the chocolate chips in the microwave in 30-second intervals, stirring well between each to ensure smoothness and prevent burning.
- Attach Sugar Cones: Dip the rim of each sugar cone into the melted chocolate, then immediately place the cone upside down onto a brownie circle, using the chocolate as glue to secure it.
- Add Buckle Decoration: Use the orange decorating gel to draw a small square “buckle” on each cone, adding a festive finishing touch.
- Optional Wider Brim: If desired, attach round cookies underneath each brownie circle with melted chocolate to create a wider brim effect for the witch hats.
Notes
- Allow brownies to cool completely for best structural integrity when assembling.
- Use a glass or cookie cutter similar in diameter to the cone base to ensure perfect fit.
- Microwave chocolate chips in short bursts to avoid scorching.
- Cookies as wider brims add a fun look but can be omitted for simpler hats.
- Store assembled witch hats in a cool place to prevent melting.
- Prep Time: 15 minutes
- Cook Time: 30 minutes
- Category: Dessert
- Method: Baking
- Cuisine: American
Keywords: Halloween brownies, witch hat brownies, festive treats, chocolate brownies, Halloween dessert

